Showing posts with label kraft. Show all posts

Sunday, November 2, 2014

Let's make card series part 4: "Baby cards"

Hi everyone, today I have a few baby cards for you to share. I made two for boys and two for girls. For all four cards I used a cutting file from the silhouette online store and a some heavy kraft cardstock for the card base.


For the background of the first two cards I used paper from Maggie Holmes for Crate paper. I die cut a scalloped circle and glued my title on it. Ti finish the card of, I added some embellishment like a bow, a few buttons and a piece of ribbon.


For the other two cards I partially dry embossed my card base with my mini polka dot embossing folder. I glued a cute die cut on every card, added a piece of ribbon and my title. So simple!


Thank you for stopping by and have great week you guys! 

Thursday, October 23, 2014

Lets make cards series Part 3: "Merry Christmas again"

Hey everyone, this is part three of my kraft card making series and I've got three christmas cards to share with you again. 


For the first one I used patterned 6x6 paper from the DIY Shop by Crate Paper for the background. I put a piece of kraft cardstock on top, stamped a few different snowflakes and doilies with Versamark Ink and heat embossed them with white fine embossing powder. To finish that card of, I added a heat embossed sentiment and a bow with some bakers twine and a button. 


The second card is pretty simple - I just cut out three circles in different sizes from green shiny cardstock and added patterned paper scraps behind each one. After that I applied a tiny bow on the top of each ornament and drew some faux stitching lines around with my white gel pen. At the end, I heat embossed the sentiment with gold embossing powder on a piece of vellum and glued it at the bottom of the card.


The last card I really like the best. It's a scrap lift of a card which I found on the Hero Arts blog. I really love the wreath and the color combo. To create that wreath, I punched out a lot of branches in two different tones, as well as a few little stars in silver and pearlescent rose paper. A few of the stars are covered with silver glitter and a few are covered with stickles in Diamond. Before I glued down the branches, I spritzed a little bit of pearlized water on the background for some extra shine. I added again some faux stitching around the edge of that card with my white gel pen and added a christmas sentiment above a piece of ribbon. 


And that's a closer view on the pretty little wreath. 
I hope you enjoyed these cards, thank you for stopping by and hope to see you soon again!

Sunday, October 12, 2014

Let's make cards series Part 2: "Merry Christmas"

Hey crafters, here's part two of my kraft card making series.


The first one is quiet simple. I used a Christmas paper stack by Glitz design for the background as well as for the four little banners. I topped the card with red velvet ribbon, a tiny button and a little bit of bakers twine. For that little extra I sketched down the word "Merry" and created a 3D look by using liquid pearls in buttercup and garnet. 


For the second card I stamped a lot of different snowflakes on the edges with Versamark Ink and white heat embossed them. After that, I inked all the edges with white chalk ink for a frosted look. In the middle of the card you can see two die cut pieces: a scalloped circle made out of vellum, and golden snowflake. I don't have any glitter paper so I used double sided adhesive tape on some paper scraps and after die cutting, I topped it with fine golden glitter. To prevent a mess, I used a bone folder to rub in the glitter so it won't come off. I've seen this technique in a video by Jennifer McGuire Ink (here's the link to her video). In the middle of my snowflake I glued a golden sequin for a finishing touch.


The third christmas card is a shaker card. I created a vellum pocket by stitching three sides of a rectangle. After stamping and gold heat embossing my sentiment, I filled the pocket with different sizes and shapes of sequins. Then I stitched the fourth side of the rectangle, too so that the sequins won't fall out of the card. At the end I glued a few punched out stars and crystal gems to the card.


My fourth and last card is pretty simple, too. First of all I die cut a snowflake into a piece of cream cardstock and stamped my sentiment with Archival ink. After that I run the piece of cardstock with an embossing folder through my Big Shot to emboss a dot pattern. I used the die cut snowflake and set it a little bit of to create a layered effect and topped it with a little button and bow with bakers twine. To finish the card, I wrapped some of the bakers twine around the card and glued everything to a mat and then to the card base. 

Thank you for stopping by!

Thursday, January 16, 2014

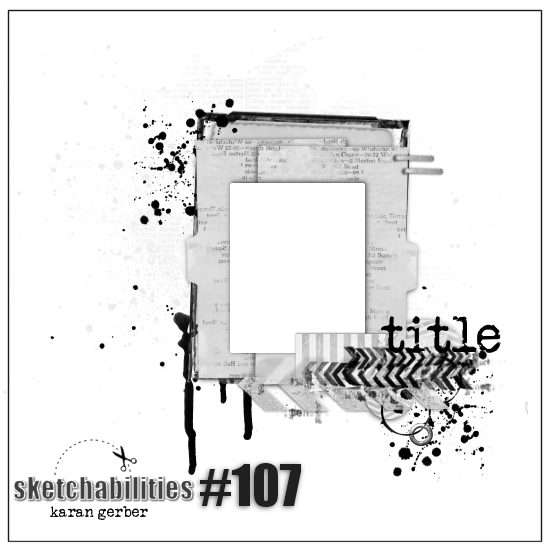
Sketchabilities Challenge #107

Hi Scrappers! Yesterday Karan revealed her new sketch for the 
Since my term as a DT-member will start with sketch #109; I submit my layout for the current challenge. After having done some clean layouts with really bright and shiny colors, I decided to create this time a more vintage looking and distressed one, with neutral colors like black and kraft. 
And here we go...: 


The background paper is from the Papermania "All aboard" collection. It's a british company and probably unknown to most of you. But they have really cool stuff and they aren't expensive. To create the background behind the picture and the layered scraps, I covered up a rectangle in with some washi tape, colored it with acrylic paint and let it dry. After that I used a mask and modeling paste mixed with acrylic color. On top, I spritzed some Glimmer Mist over some spots of the layout. At the edges of the bg paper I used a clear stamp from Kaisercraft and black Archival Ink. 


Then I added some star-shaped brads by Prima. They just matched perfect with these vintage colors. 


The little label is from Tim Holtz and the tag is hidden in a pocket behind the layered paper, so I could add some journaling. 


I used perfect pearls to create the small arrows (is that the right expression? I'm not sure if these are really arrows ^^) For the taller arrows I used textured sticky cardstock. 


Some close-up of the layering...


...and the background with the mask :) Thank you for stopping by and don't forget to submit your own layout for this cool sketch! See you soon!