Friday, February 28, 2014

Sketchabilities #110 - "longing"

Hey everyone and welcome to the latest sketchabilities skecht challenge! I wanted to create another girly layout with soft powder colors, and this is it! :)


And this is the beautiful sketch: 


We have great sponsors for this challenge and FOUR prices! So just go ahead and give it a try! 

our first and second price is sponsored by:

the third price is sponsored by the Cardabilities/Sketchabilities Blog Owner and Sketch Designer Karan Gerber:
 she is offering up a $25.00 Gift Card to the Silhouette Online Store (how great is that?!)

and our forth and last price is 
Creative Embellishments is offering up a $25.00 Gift Card to their online store!


 If you have any questions, don't hesitate to comment and ask me :) Thanks for stopping by and have a great weekend!

Hugs, Mrs. Scrapalot


Tuesday, February 25, 2014

Brownie, my Sweetie Pie :)


Hi everyone, I'm back with another layout! This time I scrapped my cat :) His name is Brownie and as you can see, he's my sweetie pie :) I worked with sketch #22 by ScrapFriends and I used the mood-board by Scrap around the world for this layout, too. You can find their wonderful mood-board and the sketch I used at the end of this post.


I used a lot of different sprays and inks to create my clustered background. I was inspired by the colors of the mood-board and I tried to catch the orange, pink and gold of it. Besides, it inspired me to use the title "you are my sweetie pie".


I played with different sizes and mediums to create checker-boards (stamps, masks, brads).


My sweet title...


... and a little bit of my background stamping... :)


I used gel medium on my orange hearts and covered them with Inka Gold after that. The gel medium resists the Inka Gold and reveals the orange paper. 


And here are the beautiful mood-board and the sketch I used for this layout:


Thank you for stopping by! :)


Saturday, February 22, 2014

My very first Art Journal!

Today I have even some more news to share :) I wanted to start an Art Journal since long, and the beginning of this month I was on a Workshop with Anna Dabrowska (a.k.a. Finnabair, visit her blog)! I already wrote that I'm a huge fan of her and her artwork, and I had a fantastic weekend.  It was all about Mixed Media, Grunge and using everyday items and your scraps. I can only recommend her workshops, as she's such a friendly and crazy person :) Anyway, we had a workshop about Art Journaling, and I wanted so share with you, what we created. Such a great opportunity to start with an Art Journal :)


This is my cover of the journal, it's by Prima (as all of the embellishment, too). It was really fun to play around with all the media and to create this dimensional cover. We even used some teabags! :)


And that's the back of my Art Journal.


During the class, we created 3 double-sided pages, too. Anna showed us a lot of different techniques how to use all of your scraps and papers you don't like too much. I really love how the pages turned out! Now I'm very inspired to create my own pages and to go on with this Art Journal.


I hope you like it :) 

Thank you for stopping by! 

WW1 and Scrap&Music

Hi Scrappers! After a busy week I had finally some time take some pictures of my latest creations :) I used the sketch from Scrap&Music #21 and the color scheme by the WW1 february challenge.


And that's my mixed media creation! I used the faded dot mask by Tim Holtz with modeling paste and a second flourish mask with gel medium. Besides I sprayed my background with two shades of grape and stamped different textures in black to create a kind of cluster.


I'm not such a big fan of wahsi tape (just because I never know where to use it ^^), but this layout was the perfect opportunity to use some of it. I added a bit of baker's twine, too.


The butterfly is made out of resist canvas by Prima.


For the first time, I cut out my photos and replaced the background with a cool resist paper. I colored with my Gelatos with matching shades.


And that's a close-up of my background work. I colored my wood veneers with Glimmer mist and added some tiny dots with liquid pearls. 

And here's my inspiration:


Thank you for stopping by and have a great weekend! :)


Friday, February 14, 2014

Sketchabilities #109 reveal

Hey Scrappers!

It's great to see you around and having a look at my first DT reveal for Sketchabilities! It's about sketch #109 and it's just as awesome as usual :) I had a lot of fun creating a layout with this sketch and used a lot of mixed media. So come on and give it a try, join the challenge, too! The DT-Ladies will give you some inspiration for your creations on the Sketchabilities blog. Besides, we have a great sponsor this month: 
It's Chapel Road Stamps - division of Class Act Stamps - a Canadian Company just launched
through Notions Marketing at Winter 2014 CHA

go ahead and visit them: 


For the background I used a polka-dot paper and lots of different paints. First I misted a part of the paper with Dylusion Inks, Mr. Hueys and Perfect Pearls Mists in different blueish and greenish shades. For the contrast I applied some white ink, too. After that I stamped a flourish pattern using a blue Gelato.


I cut out the title and the branches with my Silhouette,


and applied some Jelly paint for more texture.

´

Then I added a few buttons and some washi-tape to embellish the page. I stamped around the edges with one of my Kaisercraft texture stamps. On this picture you can see the stamped image with the Gelato quiet good. I like the distressed look it gives to your project.


And here's another close-up of the Jelly paint. 


Now it's your turn to create a beautiful and awesome layout with the new sketch! 


Thank you all for stopping by, wishing you all a great Valentine's Day and a happy weekend!
I'm excited to see what you're going to create :)


Valetins-Blog-Hop bei Family and Friends!


Hallo ihr Lieben und herzlich Willkommen zum 
Valentins Blog-Hop von Family and Friends!
Ich habe mich auch für ein ganz klassisches Werk entschieden: eine Valentins-Karte! :) 
Also großer rosa und pink-Fan mussten es natürlich diese beiden Farben sein, gemixt mit ein paar zarten Creme- und Brauntönen. 


Den obersten Layer der Karte habe ich zu ⅔ mit einem Embossingfolder geprägt und anschließend leicht in pink schattiert. Außerdem habe ich den Hintergrund mit etwas rosa Glimmer Mist besprüht. Den Rand der Karte habe ich dann noch perforiert und auf einem Stück offener Wellpappe aufgebracht.


Auf die Vintage-Spitze habe ich diverse Knöpfchen in Valentins-Farben aufgebracht.
Der Schriftzug hingegen ist ein Rub-On, umrandet von Herzstempeln.


Daneben habe ich noch Herzchen mit Liquid Pearls aufgemalt.


Und das hier ist mein Lieblingsteil der Karte: ein auf Transparentpapier aufgestempeltes Marmeladenglas, gefüllt mit Stempelherzen! :) Damit sich das Gläschen noch besser vom Hintergrund abhebt, habe ich es mit Glue-Dots aufgeklebt. Dann noch ein wenig Baker's Twine drum herum gewickelt, einen Schriftzug mit Liquid Pearls aufgebracht und fertig ist meine Valentinskarte! 

Und um den Blog-Hop zu vervollständigen, geht's hier weiter zu 

Danke für's Vorbeischauen und Kommentieren und viel Spaß beim weiter-hoppen :D 

Eure Moni :)

Monday, February 10, 2014

Family and Friends February - Birthday Calendar

Hallo ihr Bastler! 
Hi Crafters! 

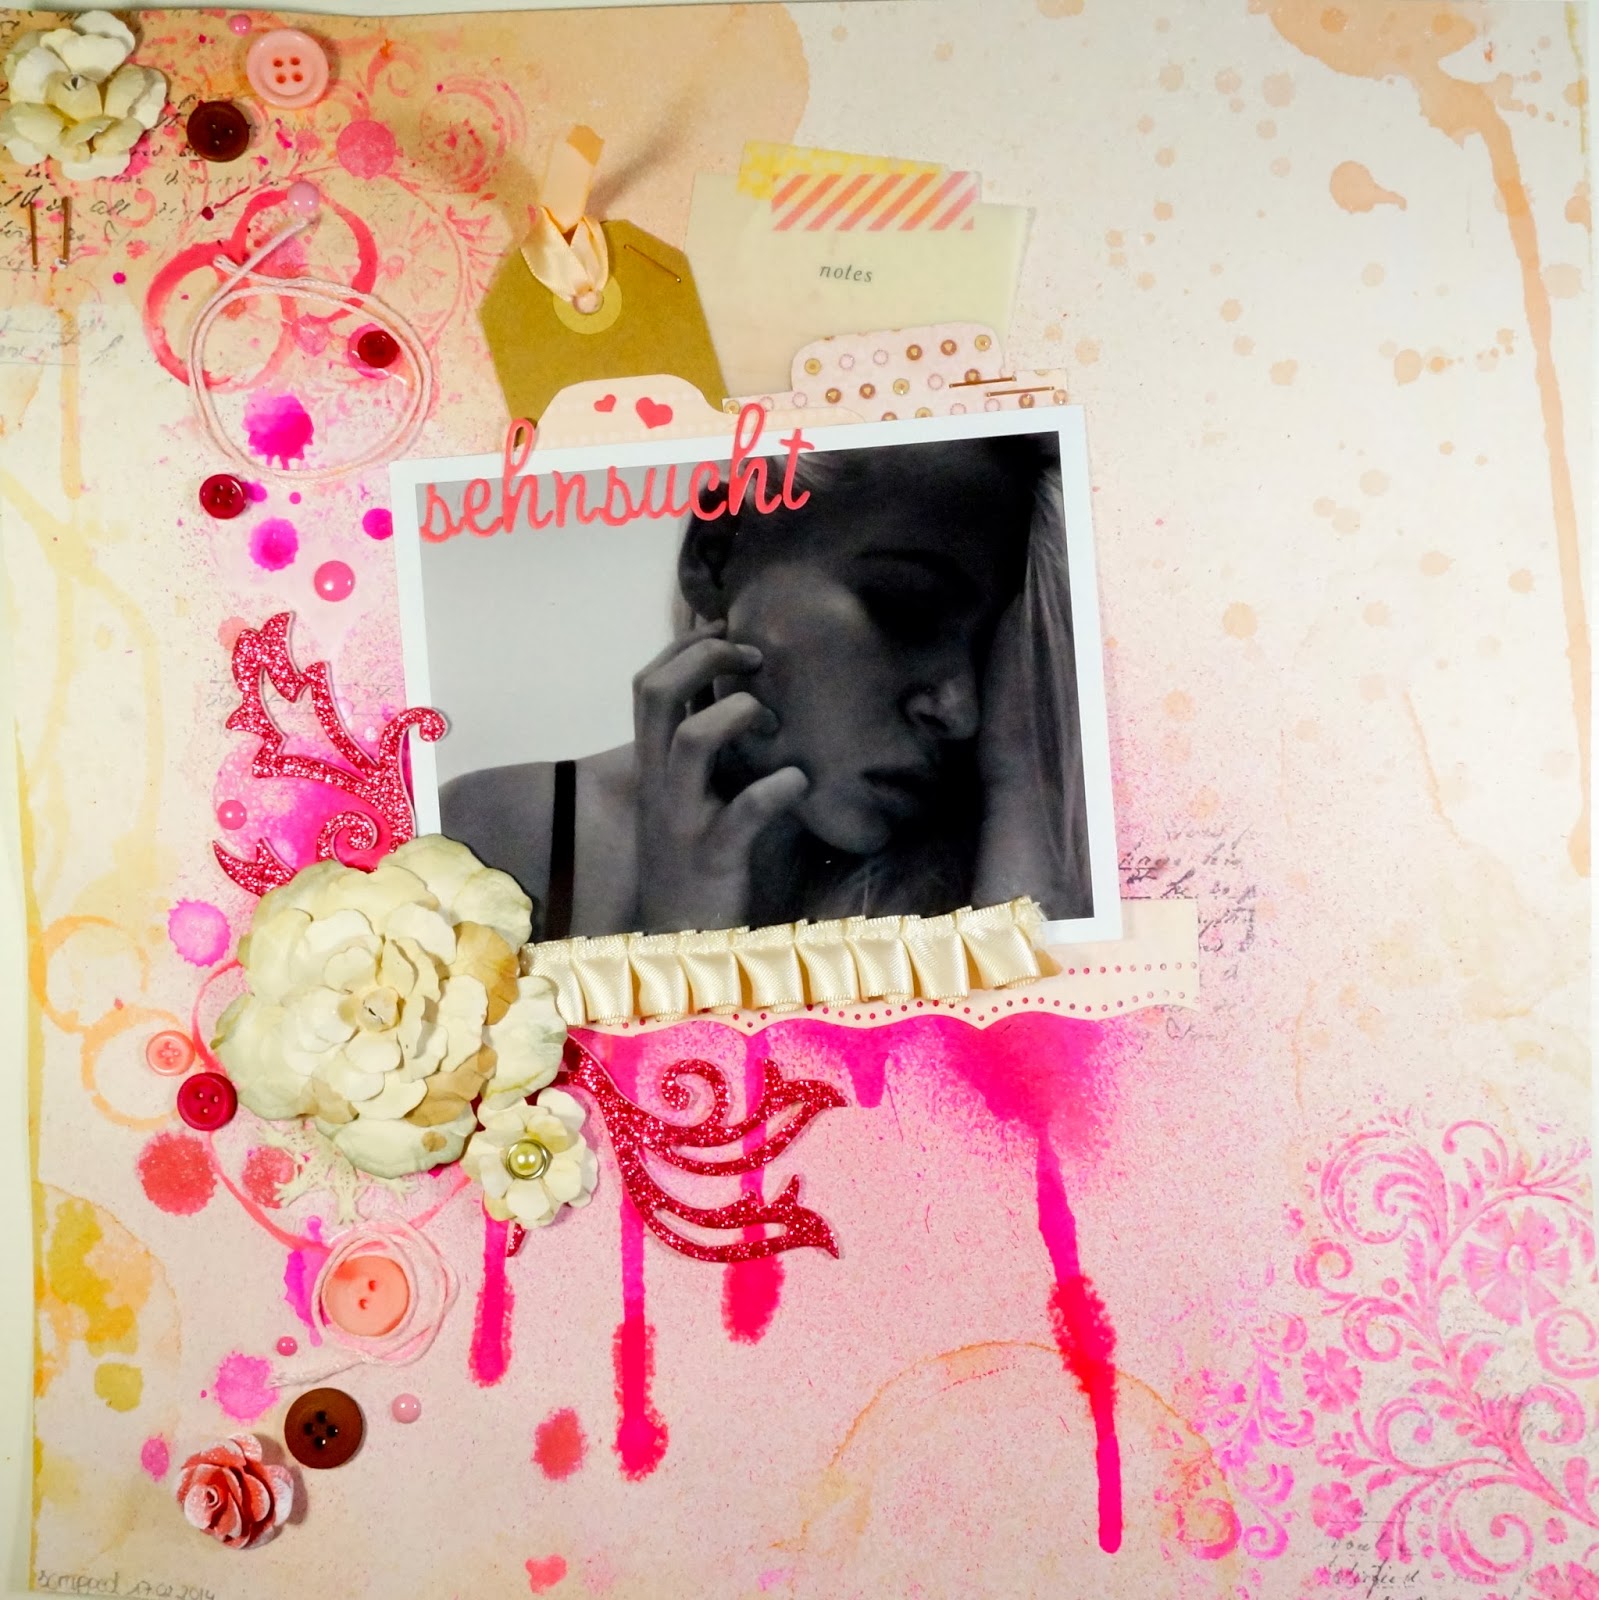
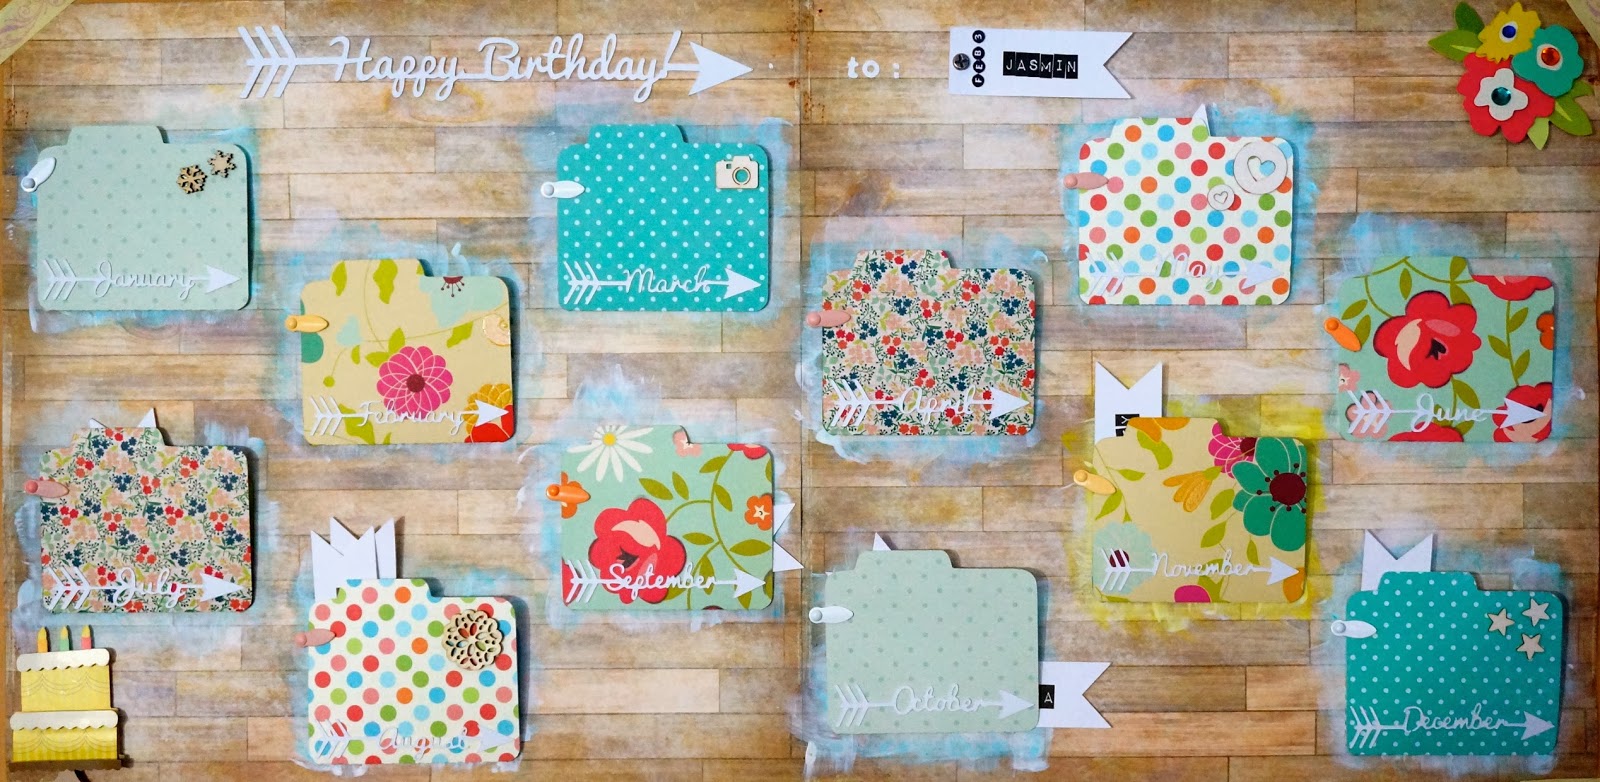
Entschuldigt bitte diesen total verspäteten Post, ich hatte ihn erstellt aber nur gespeichert und nicht veröffentlicht. Hier ist er nun aber! Meine Version des Geburtstagskalenders für die FaF Februar ChallengeIch habe mich hier für ein doppelseitiges Layout entschieden, welches ich an die Wand gehängt habe. 

I'm sorry for the late post for this challenge, but somehow I saved the post but didn't publish it. Anyway, here it is! The monthly theme from the Family and Friends February Challenge is a Birthday Calendar. I decided to create a doublesided layout with small tab-folders on it. 


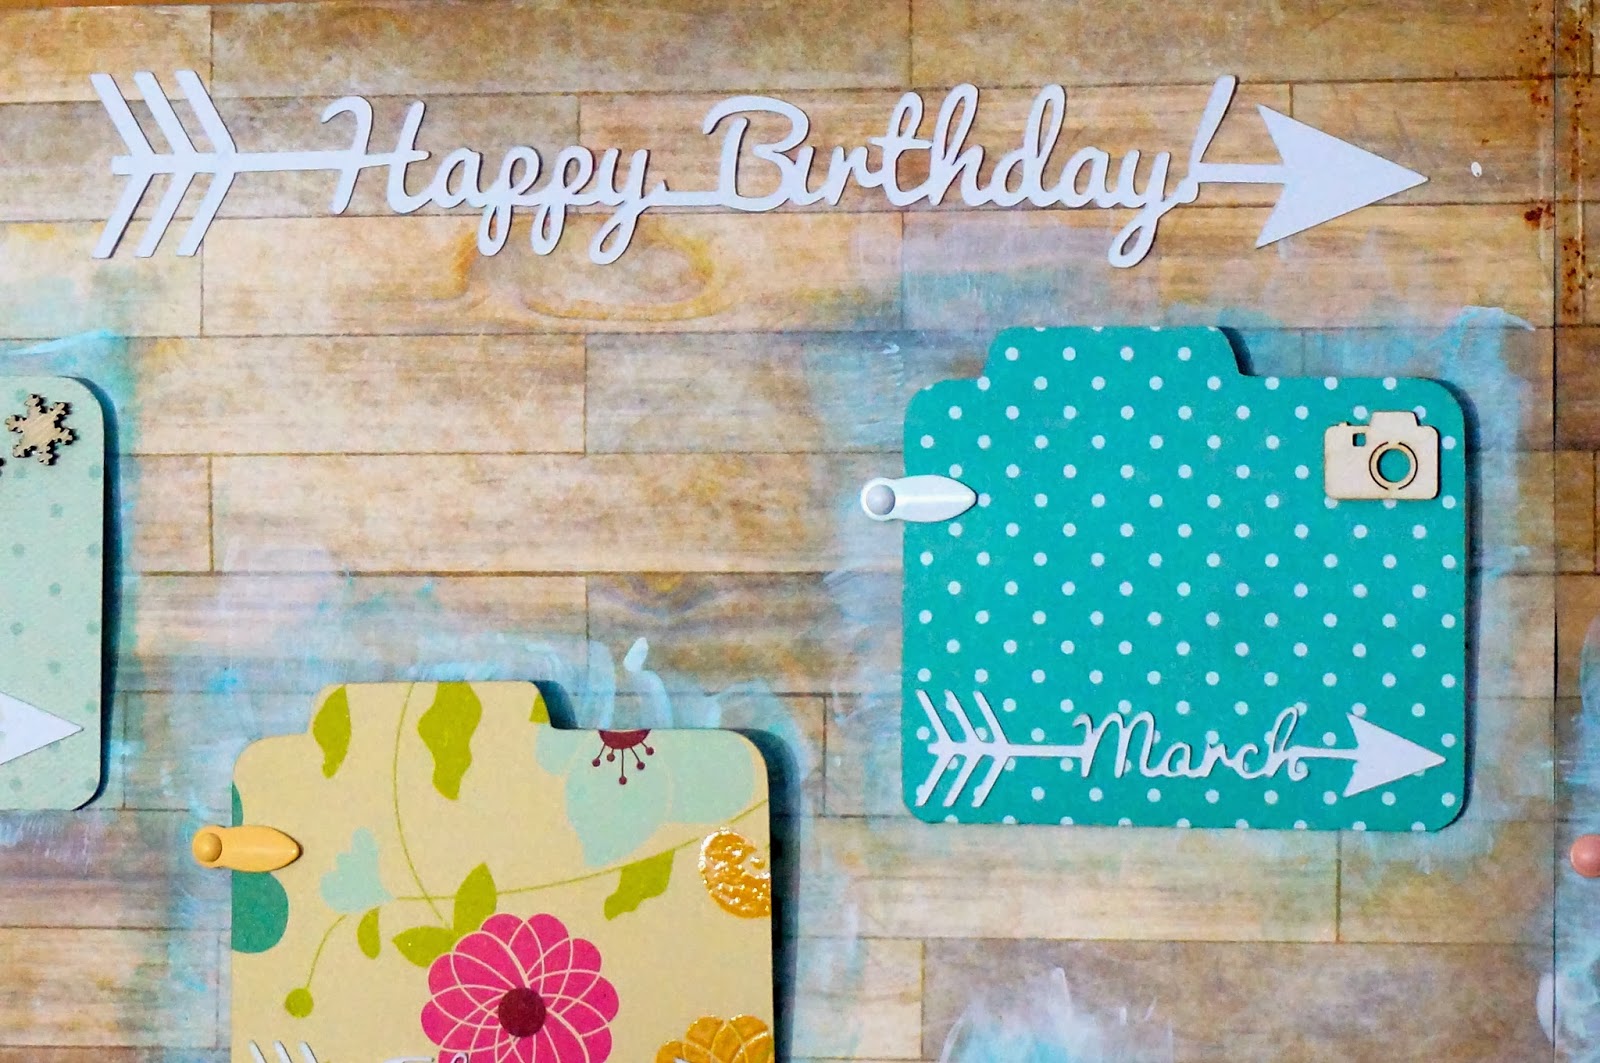
Auf dem neutralen Hintergrund kommen die bunten aber aufeinander abgestimmten Farben gut zur Geltung. Meine Silhouette kam hier sehr viel zum Einsatz: zuerst habe ich 12 kleine Ordner aus doppelseitig gemustertem Scrappapier geplottet. Danach habe ich aus weißem Fotokarton den Titel und die einzelnen Monate aufgeklebt. Um die kleinen Ordner noch besser vom Hintergrund abzuheben, habe ich mit etwas Gesso und einem hellblauen Gelato gearbeitet

I took a neutral background to make the colors of the folders more pop. For this project I used my Silhouette Cameo a lot. The title and all the months are cut out with it. I played with some gesso and a light blue gelato on the background, to create a subtle background behind the small folders.


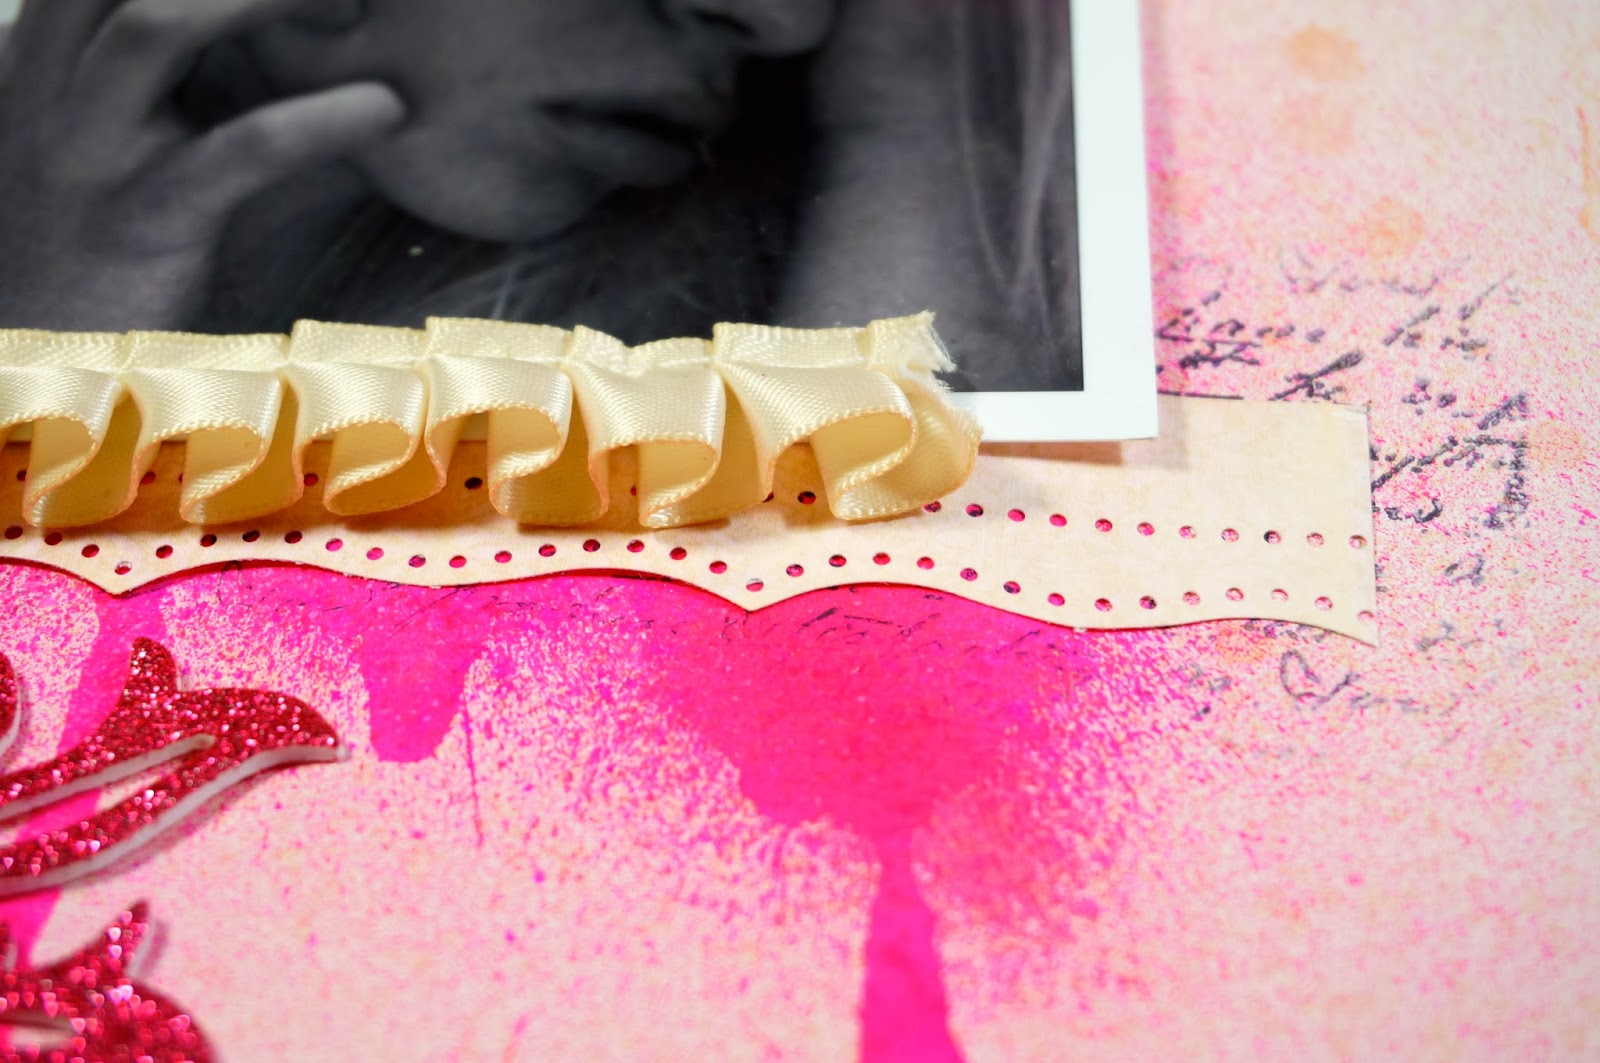
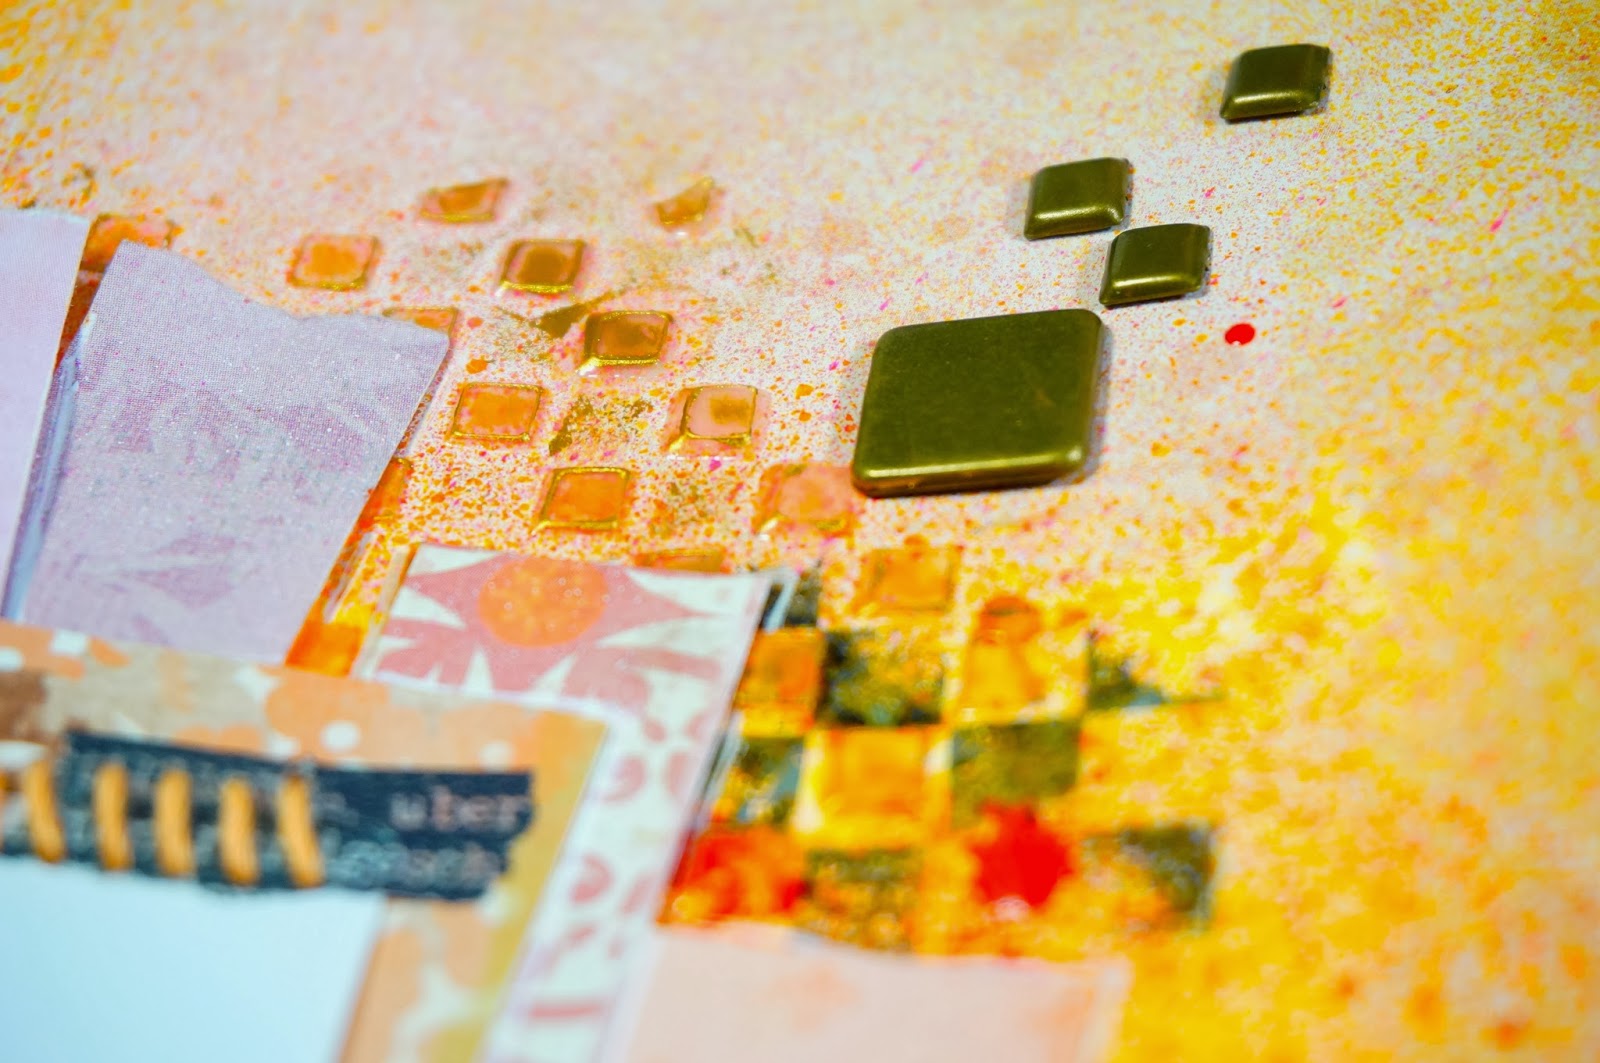
Die einzelnen Ordner habe ich dann noch mit ein paar Embellies verziert und kleine Fotohalter mit Brads angebracht, um die Ordner an der Wand geschlossen zu halten.

I embellished some of the folders with wood veneers and used tiny photo holders and brads to keep them closed. 


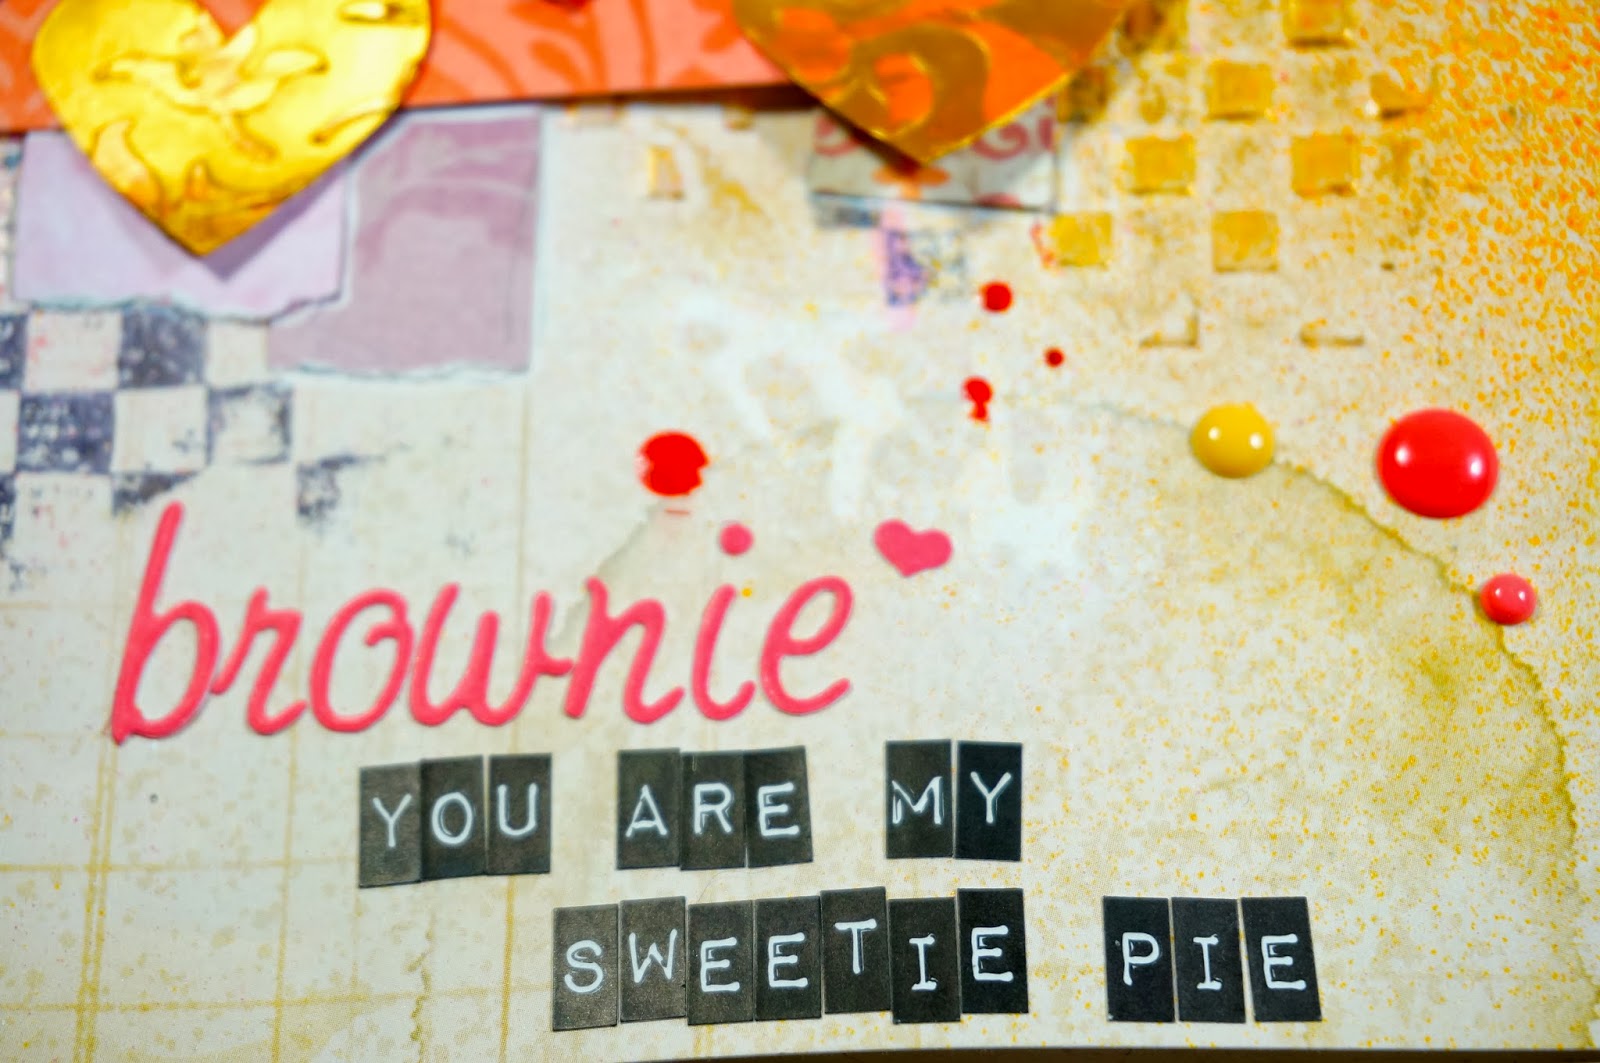
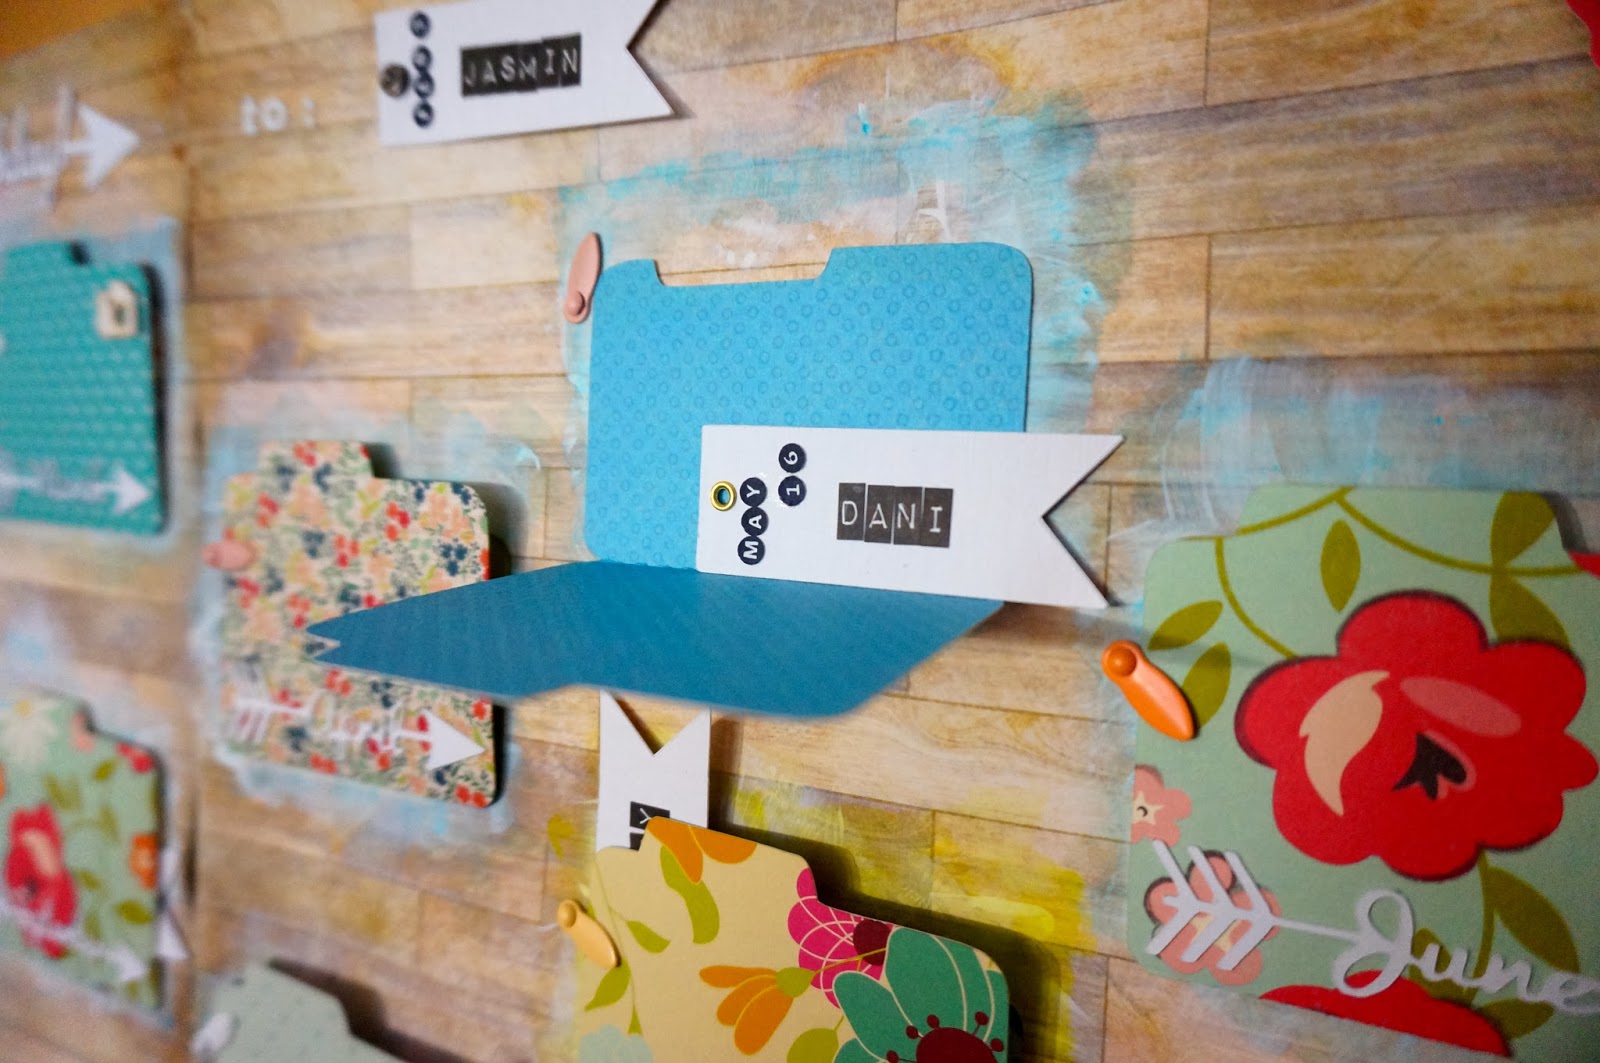
Und jetzt kommt der Clue: die Geburtstage selbst habe ich auf kleine Fähnchen aufgebracht. Der Name besteht aus kleinen Alphas, und das Datum (Monat + Tag) sind oben aufgestempelt. Die einzelnen Fähnchen bewahre ich dann im entsprechenden Monatsordner auf. Und damit man den aktuellen Geburtstag auch immer vor Augen hat, ist dieser ebenfalls mit einem Brad oben am Layout hinter dem Titel angebracht. Hier kann man gleich alle Fähnchen eines Monats übereinander anbringen, sodass man diese nur noch verschieben muss. Die Fähnchen werden dann monatlich gewechselt. 

And here's the thing with the birthdays: I cut out a lot of banners, where I wrote all the names with some alphas. I stamped the month and the day of birthday on the banners, too. The birthday-banners are all in the correct month-folder. Next to the title there's a tiny brad which holds the banner of the next birthday. This way, you can see the next important birthday all the time and you can change the banners monthly.


Hier noch eine kleine Nahaufnahme meiner Fähnchen.

Here you can see a little close-up of the banners I created:


Ich hoffe meine Kreation gefällt euch! Danke fürs Vorbeischauen!

I hope you like it an thank you for stopping by!